Tutorial: Toilet Mat - Refurbished!
Viewer discretion is advised. Post contains toilet related issues.
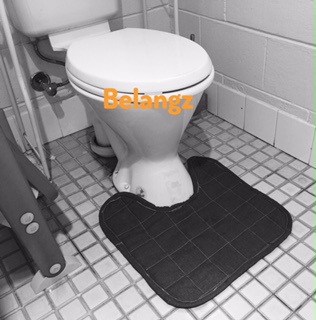
1) This is actually very clean, freshly washed... Just a very ugly looking mat. So firstly, you need an ugly mat:

2) After much deliberation, I finally decided to use this blue fabric (it was previously a scarf). Covered the whole mat on both sides, and pinned them together:

3) Used a ruler and a pen to draw evenly spaced lines on the mat. With a sewing machine, sew on the lines, starting from the middle and worked my way to the sides.

4) Repeat with perpendicular lines, making square shaped patterns.
5) Combined rectangular shaped fabric to make a long ribbon. This was used to cover the seam.

6) It is all done! Ugly mat hidden beneath a layer of scrap fabric!

The back side did not look too good as I had to combine some small pieces of cloth to have enough to cover the whole mat. Frugal level: 100.

The 'new' mat on its first ever task:
This picture needs to be in black-and-white to hide any potential criticism on the cleanliness of my toilet, hahah!


Comments